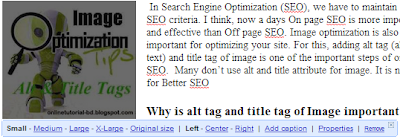
Add HTML Alt Tags and Title Tags to Images of Blogger (Blogspot) Blog
Posted by Unknown in Blogger, SEO Tutorials, Web Development on Friday, March 29, 2013

In Search Engine Optimization (SEO), we have to maintain some seo criteria. I think, now a days on page seo is more important and effective than off page seo. Adding meta and title tag, heading tag, image optimization etc. Image optimization is very important for optimizing your site. As a result, you can get more visitors from image search and web search. To optimize an image we have to add alt tag (alternative text) and title tag of image. Many don’t use alt and title attribute for image. It is now wise for better seo.
Why is alt tag and title tag of Image important for SEO?
Search Engine bots specially Google Bot can’t read your image. They can’t detect what your photo is about. They only can read texts. Suppose you have added a picture of computer in a post, Google can’t won’t be able to know what about your picture is. If you use title and alt tag to your picture, your post and image will be more seo friendly and internet browser will show the image title even If the browser’s image load option is stopped. Hope you have understood why you should put alt and title tag to an image.
So, How can we add alt tag and title tag to an image?
In wordpress, we can put title and alt tag while uploading. New blogspot bloggers don’t know how to do it. I am showing the steps for that.
Step 1: Add an Image as usual method in your new post or if you have already added any image start from Step 2
Step 2: Now click on the uploaded Image > click on Properties>
Step 3: Now put your suitable “title tag” in title text box and “alt tag” in alt text box. They should not be more than 4/5 words. Alt tag should be your main key word of your post. Then click on OK.
Now have already done it.
How to link your post with image?
But your Image will not link to your post. If you click on the Image, it will not show your post but show only the picture. You have add link with the image to your post. For this follow the step.
Step 1: After uploading image and putting the title and alt tag to image, click on the Edit HTML tab from the Post Editor Box Toolbar
Step 2: Search for your image html source code. That looks something like that
<div style="text-align: left;">
<a href="https://blogger.googleusercontent.com/img/b/R29vZ2xl/AVvXsEiGFJHRe7WQlIJcolJkfnw1Y8JY9mrXpwFy3Jci2JYoI5kqHEIlAdkni0jbysuLt3vblcLScwh6uB7G__361x1NsXIbAEMfiXIR2erezNu_ssYDEWuNl4jkalHPX5PqpG4Z2Rev0FaoeL8f/s1600/images.jpg" imageanchor="1" style="clear: left; display: inline !important; float: left; margin-bottom: 1em; margin-right: 1em;"><img border="0" height="120" src="https://blogger.googleusercontent.com/img/b/R29vZ2xl/AVvXsEiGFJHRe7WQlIJcolJkfnw1Y8JY9mrXpwFy3Jci2JYoI5kqHEIlAdkni0jbysuLt3vblcLScwh6uB7G__361x1NsXIbAEMfiXIR2erezNu_ssYDEWuNl4jkalHPX5PqpG4Z2Rev0FaoeL8f/s200/images.jpg" width="200" /></a>
</div>
Step 3: Now delete the red colored link and replace your post link.
Now your post image is fully ready for better optimization. Always try to use your post keyword (Just one keyword) on your Image Alt Tag. It will help you get visitors from Image Search of the search engines too. You may also read Changing title tag of blog post.
This entry was posted on Friday, March 29, 2013 at 5:28 AM and is filed under Blogger, SEO Tutorials, Web Development. You can follow any responses to this entry through the RSS 2.0. You can leave a response.
- No comments yet.


