Showing posts with label Blogger. Show all posts

How to Add Slideshow in Blogger Blog


How to Add Slideshow in Blogger
Today it is very common to have an own blog for oneself. But many of us have little knowledge of HTML, CSS and JavaScript.  So what, can’t you create a professional Blog? Of course you can do it yourself. If you are new, I suggest you try free blogger of Google. With the help of Google search you can get many more tutorials you need. In this post I am going to show how to add slideshow in blogger above blog post. Using a slideshow you can attract your visitors to your hot and topmost posts. Besides, it makes your blog look professional and beautiful.

Please carefully follow the steps to add a slideshow in blogger blog.

Step 1: Go to your Blogger’s Dashboard > Click on Arrow button > and click Layout from dropdown menu.

Step 2: Click on Add a Gadget above you Blog post > than add HTML/JavaScript Gadget from pop up window. If cannot see “Add a Gadget” above Blog post, you have to add widget container above blog post.

Add slideshow in blogger

Step 3: Now put the following code in HTML box


<style type="text/css">
 /* JavaScript Image Slider/ */

#mcis {
 display: none;
}

#sliderFrame {
 position: relative;
 width: 100%;
 margin: 0 auto;
        border:5px solid #000;
}

#ribbon {
 width: 111px;
 height: 111px;
 position: absolute;
 top: -4px;
 left: -4px;
 background: url(https://blogger.googleusercontent.com/img/b/R29vZ2xl/AVvXsEgSuISWz8unbe75QiOp5wyyCxifWR7IUjWWewj3nyDUOVh0JNX1xGnXRfIe_IUt-8KT4cW4dMh_ydIY8zf63JO4SmvdX5VOuYTXOBmva1-XxgKcp-_Gl02N4Q5-754LX2V7SYMsKmapXV8/s1600/helperblogger.com-ribbon.png) no-repeat;
 z-index: 7;
}

#slider {
 width: 100%;
 height: 250px;
 background: #fff url(https://blogger.googleusercontent.com/img/b/R29vZ2xl/AVvXsEhsF12FFtWW8Xd0I9U2OkvtuJCojeALgB0dVk8b7Q_g2W1sTGzeSfyQcwikouuLs5vDhxLE5ngyudYg20UjxDIzzzaSyk3elruh6KnX1bxLun8lNo3ObRLm0KVn5xStxlXbUwJID2eg5g0/s1600/helperblogger.com-loading.gif) no-repeat 50% 50%;
 position: relative;
 margin: 0 auto;
 box-shadow: 0px 1px 5px #999999;
}

#slider img {
 position: relavive;
 border: none;
 display: none;
}

#slider a.imgLink {
 z-index: 2;
 display: none;
 position: absolute;
 top: 0px;
 left: 0px;
 border: 0;
 padding: 0;
 margin: 0;
 width: 100%;
 height: 100%;
}

div.mc-caption-bg, div.mc-caption-bg2 {
 position: absolute;
 width: 100%;
 height: auto;
 padding: 0;
 left: 0px;
 bottom: 0px;
 z-index: 3;
 overflow: hidden;
 font-size: 0;
}

div.mc-caption-bg {
 background-color: black;
}

div.mc-caption {
 font: bold 14px/20px Arial;
 color: #EEE;
 z-index: 4;
 padding: 10px 0;
 text-align: center;
}

div.mc-caption a {
 color: #FB0;
}

div.mc-caption a:hover {
 color: #DA0;
}

div.navBulletsWrapper {
 top: 250px;
 left: 190px;
 width: 150px;
 background: none;
 padding-left: 20px;
 position: relative;
 z-index: 5;
 cursor: pointer;
}

div.navBulletsWrapper div {
 width: 11px;
 height: 11px;
 background: transparent url(https://blogger.googleusercontent.com/img/b/R29vZ2xl/AVvXsEibihKGng7FN650WgZi7dW6fv2qiOgAnn7Cp8U4htKvh71jBDgpWUSqJSeUS8izjuG8D4oHiKNCUyTyIMmHpC-41vnyB7lHiXlr6WNLBtcOGsZ0RBpi4PTwPV-e_SLG9etSIqy_IiD-sv0/s1600/helperblogger.com-bullet.png) no-repeat 0 0;
 float: left;
 overflow: hidden;
 vertical-align: middle;
 cursor: pointer;
 margin-right: 11px;
 _position: relative;
}

div.navBulletsWrapper div.active {
 background-position: 0 -11px;
}

#slider {
 transform: translate3d(0,0,0);
 -ms-transform: translate3d(0,0,0);
 -moz-transform: translate3d(0,0,0);
 -o-transform: translate3d(0,0,0);
 -webkit-transform: translate3d(0,0,0);
}
 </style>

<script src="http://code.helperblogger.com/js-image-slider.js" type="text/javascript"></script>
<br />
<div id="sliderFrame">
<div id="ribbon">
</div>

<div id="slider">
<a href="http://traffic-payout.blogspot.com/2013/01/ways-to-earn-online.html"><img alt="Put your Post Title" src="https://blogger.googleusercontent.com/img/b/R29vZ2xl/AVvXsEg1iKjFtf_pZB7nql29MMnkyNldz8Q8E-MbW3XMj2vXiuQWOXGn7xbe8ECA5q78ErO_Qlw_XzKbCUi0mnmcG2_mCmfzfXebFNHgrc3KeNYRjFM_MgBpQWLoueVBx4XVuXo9cQaqO-XSqYw/s1600/1.jpg"/></a>

<a href="http://traffic-payout.blogspot.com/2013/04/how-to-seo-blogger-blog.html"><img alt="Put your Post Title" src="https://blogger.googleusercontent.com/img/b/R29vZ2xl/AVvXsEhlC52vR_ri-8eWBwxyGz4-f4FUVGNN5BqtiHKq_3jqLhUaoWoZ3PKciDotj0i8d9OfL0rUqIBCZOG3AcUCzgMmnLFAFZY0UGeMLR7cDLLg4ex-Bw4wIsempa8m-2itJNcn5uCyadDis2k/s1600/2.jpg" /></a>

<a href="http://traffic-payout.blogspot.com/2013/02/direct-speech-to-indirect-speech.html"><img alt="Put your Post Title" src="image link" /></a>

<a href="http://traffic-payout.blogspot.com/2013/03/add-html-alt-and-title-tags-to-images-of-blogger.html"><img alt="Put your Post Title" src="image link"/></a>
<a href="#"><img alt="Get SSC 2013 Results" src="https://blogger.googleusercontent.com/img/b/R29vZ2xl/AVvXsEhWsQm7tos1vkqDPazfJykZC72p6z6DS-B5hjFQ4z0z580cPJUolyKWHWa4uf1VLgs4fb92fYgIJXiZox8veoZGvsVIwY6YmVETTay8nq48_xfpBITcYAv7-h-C5gsFTnqGb-5X_OYGw4s/s1600/3.jpg" /></a>
     </div>
   </div>
</div>

Customization:
To customize the height of the Slider, change the following code. Width does not need changing.

#slider {
 width: 100%;
 height: 250px

To change image of Slideshow
Change the Post link,  image link and Alt tag with your post title.

<a href="Post _link"><img alt="Post title" src="Image_link"/></a>

Hope you can easily do it yourself. If you need any help don’t hesitate to comment and ask your question. 

How to Add Widget above Blog Post in Blogger


Blogging has become one of the topmost ways of making money online. Many are making a handsome money from Blogging. Now it is very common for everyone who uses internet to have a Blog site. If you don’t have a blog you may learn how to create a professional blog.
As you know that we use many widgets in blog. If some widgets like Slide show and Ads are shown above your blog post, it will be better. But in blogger template you cannot add a widget avove Blog post. In this tutorial I will be showing how to add a widget above the Blog post. For this follow the easy steps:

Step 1: Go to Blogger > and click on template from dropdown menu.

Step 2: Now backup your template and Click on Edit HTML

Step 3: Template editor opens. Press (Ctrl + F) and search. Now search for the code. 
<div id='main-wrapper'>

Now find the following code after <div id='main-wrapper'>

        <b:section class='main' id='main' showaddelement='no'>

Step 4: You have to change the “no” into “yes”. Then the code will look like
        <b:section class='main' id='main' showaddelement='yes'>

Now click Save Template. Now you will be able to add widgets above blog post.

How to SEO Blogger Blog - SEO Tips and Tutorials


how to seo blogger blog
The article is for the very new beginners. They might want to know how to seo your blog. The great article contains some of the most important steps that are very needed to do seo your blogger blog on search engine. If you follow the basic steps of optimizing your site, your blog will be more seo friendly and will be indexed in search engines more efficiently. SEO is one of the competitive and interesting task today. Day by day, the seo techniques are being changed.
However, I will be writing some of the most effective techniques to do seo for blogger blog though there are some other important techniques too. I will be writing all important seo tips such as meta tag and meta description, changing title tag of Blog, post header tag, internal and external linking, use of nofollow link attributes, anchor tags etc. Lets read them attentively.
Comming.........


Add HTML Alt Tags and Title Tags to Images of Blogger (Blogspot) Blog

add alt tags and title tags
In Search Engine Optimization (SEO), we have to maintain some seo criteria. I think, now a days on page seo is more important and effective than off page seo. Adding meta and title tag, heading tag, image optimization etc. Image optimization is very important for optimizing your site. As a result, you can get more visitors from image search and web search. To optimize an image we have to add alt tag (alternative text) and title tag of image. Many don’t use alt and title attribute for image. It is now wise for better seo. 


Why is alt tag and title tag of Image important for SEO?

Search Engine bots specially Google Bot can’t read your image. They can’t detect what your photo is about. They only can read texts. Suppose you have added a picture of computer in a post, Google can’t won’t be able to know what about your picture is. If you use title and alt tag to your picture, your post and image will be more seo friendly and internet browser will show the image title even If the browser’s image load option is stopped. Hope you have understood why you should put alt and title tag to an image.

So, How can we add alt tag and title tag to an image?
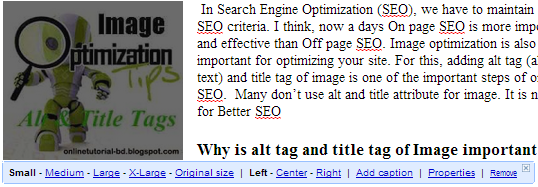
In wordpress, we can put title and alt tag while uploading. New blogspot bloggers don’t know how to do it.  I am showing the steps for that.


Step 1:   Add an Image as usual method in your new post or if you have already added any image start from Step 2
Step 2:   Now click on the uploaded Image > click on Properties>


Step 3:   Now put your suitable “title tag” in title text box and “alt tag” in alt text box. They should not be more than 4/5 words. Alt tag should be your main key word of your post. Then click on OK.

add alt and title tag to image

Now have already done it.

How to link your post with image?


But your Image will not link to your post. If you click on the Image, it will not show your post but show only the picture. You have add link with the image to your post. For this follow the step.


Step 1: After uploading image and putting the title and alt tag to image, click on the Edit HTML tab from the Post Editor Box Toolbar


Step 2:  Search for your image html source code. That looks something like that

<div style="text-align: left;">
<a href="https://blogger.googleusercontent.com/img/b/R29vZ2xl/AVvXsEiGFJHRe7WQlIJcolJkfnw1Y8JY9mrXpwFy3Jci2JYoI5kqHEIlAdkni0jbysuLt3vblcLScwh6uB7G__361x1NsXIbAEMfiXIR2erezNu_ssYDEWuNl4jkalHPX5PqpG4Z2Rev0FaoeL8f/s1600/images.jpg" imageanchor="1" style="clear: left; display: inline !important; float: left; margin-bottom: 1em; margin-right: 1em;"><img border="0" height="120" src="https://blogger.googleusercontent.com/img/b/R29vZ2xl/AVvXsEiGFJHRe7WQlIJcolJkfnw1Y8JY9mrXpwFy3Jci2JYoI5kqHEIlAdkni0jbysuLt3vblcLScwh6uB7G__361x1NsXIbAEMfiXIR2erezNu_ssYDEWuNl4jkalHPX5PqpG4Z2Rev0FaoeL8f/s200/images.jpg" width="200" /></a>
</div>

Step 3:   Now delete the red colored link and replace your post link.


Now your post image is fully ready for better optimization. Always try to use your post keyword (Just one keyword) on your Image Alt Tag. It will help you get visitors from Image Search of the search engines too. You may also read Changing title tag of blog post.

How To Create Online Form For Website or Blog without HTML Knowledge.

Create Online Form With Online Form Builder

How are you all? Hope you are OK. In this post I am going to give you a very useful tip for those who have a website or blog but have little knowledge of HTML and CSS. Many of us have blogs or websites. In a blog or website, we need various forms such as Contact Form, Login Form, Registration Form, Sending Mail Form etc. Creating an online form is not possible If you don’t have HTML or CSS coding knowledge. But you can do it with the help of free Online Form Builder. I have found the easiest online form creator sites.

Top 5 Online Form Builders:

JotForm: Here you don’t need to sign up. Just pick up the desired template and edit the template as your own. JotForm has a ton of pre-made templates for you. It is a drag-and-drop form builder; just select a tool you require, and drag it onto the building area where you can preview what your form looks like.

After designing you have to click Embed option and choose the option you need. I think you should embed the form in your website page with source code. It loads fast on your site.

There are some other Online Form Maker that are  also very helpful. You might also try these sites.

PForm-OnlineTutorialBD
HTML Form-OnlineTutorialBD
Reformed-OnlineTutorialBD
Accessify-OnlineTutorialBD
Hope these online form builders will help a lot. Please don't forget to put a comment. You can ask me regarding your problem. Good bye. Take care.

Incoming Search Terms:

how to create online form
Creating an online form
creating online forms
online form builder
online form maker
Contact form
website development


How to Create Backlinks to Your Site

The 5 topmost ways to create quality backlinks

how to get backlinks

What is Back link?

Backlink is the link of your site placed on many other sites. A backlink redirects visitors to your site. High quality backlink is very important for ranking your site higher. Every webmaster wants to create quality backlinks towards his site to get more traffic.

Now the question is how to create quality backlinks to your site. Here are the 5 topmost ways to build quality backlinks.

1. Blog Commenting :-

Commenting in different websites or blogs that relates to your site is one of the popular ways to create backlinks. However website commenting has a few other benefits. It helps a webmaster to connect many other blogs, websites and webmasters. Thus you can increase your websites publicity and get higher page rank. Remember, you should not use backlink software, link building service or any spamming activities. It is better to find dofollow websites that relates to your site and put keywords as anchor text of your link. You should also share the link of latest published post of your site.

2. Guest Posting :-

The majority of the popular websites accept visitors placing post on their web sites. It not only raises one way links but also assists you get high quality and good amount of traffic for the web site. You are able to write a few of your very best self and exclusive articles on a popular site of high page rank. In this way you can write educational and explanative post and give your website’s link as source.

3. Forum And Article Marketing

There are many popular forums and online communities on different topics. Many webmasters are utilizing these communities to create quality backlinks for their sites. This will help webmasters to develop  an exceptional backlink for the web site. A fresh and new forum of fewer people can offer you a highly authoritative backlink for your site compared to older community forums. Furthermore, using article marketing sites can assist you designed top quality one way links for the web site. In this way, you need to distribute your current articles on those sites. In this manner you possibly can receive a web page link for the web site. You need to be thorough prior to picking any document service as many of them today are merely web page link plants that happen to be getting devalued by Google Panda's latest formula. And so you have to do some analysis prior to picking a bit of good document service. Ezine and Goarticles are generally some of the best article marketing sites.

4. Social Bookmarking Websites

Sharing your posts on the web sites like StumbleUpon, Twitter, Facebook or Myspace, LinkedIn and Delicious is called social bookmarking. Social bookmarking sites play a very important role to create quality backlink and get more traffic. Today almost every visitor uses social sites and search engines to get their information. In this way you can reach so many visitors in a short time. I think it is very easy and simple way to share your posts. Many popular and top ranking sites are using these social sites to reach probable visitors. Furthermore,  you will find lots of websites that allow sharing your web site for free. Many times some webmasters create backlinks on low quality websites. These low quality backlinks can lessen your page rank. Google Algorithms like Panda and Penguin may also punish your web site regarding these kind of poor backlinks.

5. Yahoo Answers:

It is also a better idea to create quality backlink with the help of Yahoo Answers. You can answer the questions of visitors that interests you. Here is a good chance to publicize your site. You can give your answer and invite to read your related post. Thus you will be able to get quality backlinks and more traffic.

I expect these ways will help you a lot to create backlinks to your blog or website. However there are many other approaches.

Add Share Button Below The Blog Post And Title

বিগত কয়েক বছর ধরে আমি ওয়েব ডিজাইনিং শেখার চেষ্টা করছি। যা কিছু শিখলাম তা আপনারদের সাথে শেয়ার করব। এই পোষ্টে আমি দেখাবো ব্লগার ব্লগ পোষ্টের নিচে এবং ব্লগ টাইটেলে নিচে কিভাবে সুন্দর শেয়ার বাটন যুক্ত করবেন। শেয়ার বাটন আপনার ব্লগকে আরও প্রফেশনাল করে তুলবে এবং অধিক ভিজিটর পেতে সাহায্য করবে।শেয়ার বাটন যুক্ত করতে আপনাকে প্রথমে ব্লগার ড্যাশবোর্ডে গিয়ে 


১। template > Back up/Restore Click করে Back up রাখুন। এবার Edit HTML ক্লিক করুন। Expend Widget চেক বক্সে টিক দিন।

২। ব্লগারের অফিসিয়াল বাটন বাদ দিতে Ctrl+F চাপুন এবং সাচ© বক্সের সাহায্যে নিচের কোডটি খুঁজে বের করুন এবং ডিলেট করুনঃ

<div class='post-share-buttons goog-inline-block'>
        <b:if cond='data:post.sharePostUrl'>
          <b:include data='post' name='shareButtons'/>
        </b:if>
 </div>

অথবা শুধুমাত্র <b:include data='post' name='shareButtons'/> এই কোডটি ডিলিট করলেও চলবে। 

৩।এবার নতুন শেয়ার বাটন যুক্ত করতে Ctrl+F চাপুন এবং সাচ© বক্সের সাহায্যে নিচের কোডটি খুঁজে বের করুনঃ
ব্লগ পোষ্টের নিচে শেয়ার বাটন যোগ করতে নিচের কোডটি

<div class='post-footer-line post-footer-line-3'/>

৪। ঠিক এই লাইনের ‍উপরে আপনার পছন্দ মত নিচের যেকোন একটি কোড পেষ্ট করুন।
লিখে খুঁজে বের করুন।

প্রথমঃ 


এই ধরণের শেয়ার বাটনের জন্য কোডঃ
<div>
<span class='st_facebook_vcount' displayText='Facebook'/>
<span class='st_twitter_vcount' displayText='Tweet'/>
<span class='st_linkedin_vcount' displayText='LinkedIn'/>
<span class='st_pinterest_vcount' displayText='Pinterest'/>
<span class='st_email_vcount' displayText='Email'/>
<span class='st_sharethis_vcount' displayText='ShareThis'/>
</div>

দ্বিতীয়ঃ


এই ধরণের শেয়ার বাটনের জন্য কোডঃ
<div>
<span class='st_sharethis_hcount' displayText='ShareThis'></span>
<span class='st_facebook_hcount' displayText='Facebook'></span>
<span class='st_twitter_hcount' displayText='Tweet'></span>
<span class='st_linkedin_hcount' displayText='LinkedIn'></span>
<span class='st_pinterest_hcount' displayText='Pinterest'></span>
<span class='st_email_hcount' displayText='Email'></span>
</div>

তৃতীয়ঃ


এই ধরণের শেয়ার বাটনের জন্য কোডঃ

<div>
<span class='st_facebook_large' displayText='Facebook'></span>
<span class='st_twitter_large' displayText='Tweet'></span>
<span class='st_linkedin_large' displayText='LinkedIn'></span>
<span class='st_pinterest_large' displayText='Pinterest'></span>
<span class='st_email_large' displayText='Email'></span>
<span class='st_sharethis_large' displayText='ShareThis'></span>
</div>

আর ব্লগ টাইটেলের নিচে শেয়ার বাটন যোগ করতে নিচের কোডটি খুঁজে বের করুনঃ

<div class='post-header'>
<div class='post-header-line-1'/>
    </div>

এবার শেয়ার বাটন কোডটি <div class='post-header'> এর নিচে পেষ্ট করুন। তাহলে কোডটি এমন হবেঃ

<div class='post-header'>
<div>
<span class='st_facebook_vcount' displayText='Facebook'/>
<span class='st_twitter_vcount' displayText='Tweet'/>
<span class='st_linkedin_vcount' displayText='LinkedIn'/>
<span class='st_pinterest_vcount' displayText='Pinterest'/>
<span class='st_email_vcount' displayText='Email'/>
<span class='st_sharethis_vcount' displayText='ShareThis'/>
</div>
<div class='post-header-line-1'/>
    </div>

৫। এখণ আবার Ctrl+F চাপুন এবং </head> কোডটি খুঁজে বের করুন। এবার নিচের কোডটি ঠিক </head> এর উপরে পেষ্ট করুন।

<script type="text/javascript">var switchTo5x=true;</script>
<script type="text/javascript" src="http://w.sharethis.com/button/buttons.js"></script>
<script type="text/javascript">stLight.options({publisher: "435b5b59-4d14-4db6-9006-09332c012dbe"});</script>

আশা করি আপনি নিজেই এটি করতে পারবেন। আর আপনার সমস্যায় কমেন্ট করতে পারেন। সবাইকে ধন্যবাদ জানিয়ে বিদায় নিচ্ছি।